
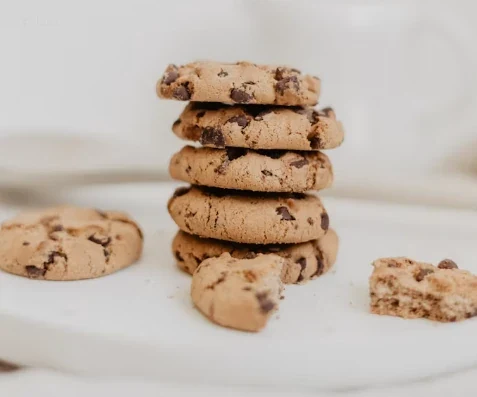
Key Details for Crumbly, Melt-in-Your-Mouth Cookies
The key details that affect crumbly, melt-in-your-mouth cookies, from butter temperature and flour quantity to mixing, resting, and baking.
Quick Answer
The key to crumbly cookies is the right balance of ingredients and mixing: limiting gluten development in the dough while allowing the butter to coat the flour sufficiently. Using softened butter without melting it, adding the flour gradually, avoiding overworking the dough, and using starch when appropriate all support a delicate, melt-in-your-mouth texture. Resting the dough briefly and baking the cookies without letting them brown too much are also critical to preserving this structure.
In This Guide
Key Reasons
- The Butter–Flour Balance Is Fundamental to Texture: Butter, or another fat used in the recipe, coats the flour particles and reduces the flour proteins' contact with water. This limits the development of long, elastic gluten bonds, giving the cookie a shorter, more fragile texture rather than the chewiness of bread.
- Too Much Flour Can Turn Crumbliness into Hardness: Adding unmeasured flour because the dough is sticking to your hands lowers the overall fat ratio. The dough can become dry and difficult to shape, then turn hard when baked.
- Starch Can Lighten the Texture in the Right Recipe: Cornstarch or wheat starch does not form gluten. If the recipe's structure allows it, replacing a small portion of the flour with starch can create a more delicate, easily crumbled texture; however, too much starch can make the cookies excessively fragile and dry.
- Mixing Time Matters: Kneading for too long after adding the flour increases gluten development and makes the cookies tougher. For a crumbly texture, the goal is not to knead the dough until smooth, but to stop mixing as soon as no dry flour remains.
- Dough Temperature Affects Spreading: Dough that looks very warm and greasy can spread quickly in the oven. A short chill allows the butter to firm up again and helps the cookies bake more evenly.
- Too Much Liquid Creates More Gluten Potential: Adding more egg white, milk, or another liquid than necessary can allow the flour to absorb more water and create a stronger dough. In crumbly cookies, the liquid should remain within the recipe's intended balance.
- Overbaking Removes Too Much Moisture: Keeping the cookies in the oven until they turn dark may make them seem crisp at first, but they can become hard and dry as they cool. Especially with pale butter cookies and flour cookies, the edges are usually done when they have colored only very lightly.
Proper Application
- Weigh the ingredients if possible. Measuring flour and starch by weight instead of compressing them into a cup prevents the dough from becoming unnecessarily hard.
- Use the butter at approximately 18–21°C —soft enough to leave an impression when pressed with a finger, but not glossy, runny, or melted.
- Mix the butter and confectioners' sugar only until smooth and creamy. Beating for too long and incorporating too much air can cause some crumbly cookie types to rise and crack excessively.
- Sift the flour and starch, if using, adding them gradually in 2–3 batches . Add the final portion according to the dough's consistency; do not force in all the flour simply because the recipe lists it.
- Once the flour is added, mix briefly on low speed or with a spatula. Stop kneading as soon as no dry flour remains and the dough comes together when pressed.
- If the recipe allows, use starch at approximately 10–20% of the total flour mixture for a more delicate texture. This is a starting range for homemade crumbly cookies; a very high proportion of starch can make them lose their shape.
- If the dough is greasy or too soft, cover it and chill it in the refrigerator for 20–30 minutes . If it becomes too firm, leave it at room temperature for a few minutes before shaping.
- Make the cookies a similar thickness. Approximately 8–12 mm is a practical starting thickness for even baking in small and medium-sized crumbly cookies.
- Preheat the oven. If the recipe does not specify a temperature, start small buttery cookies at 165–170°C top-and-bottom heat setting is a good starting point; reduce the temperature by about 10–15°C in a fan oven. Depending on thickness, check after about 12–18 minutes and continue checking until the edges are just lightly colored.
- Do not move the cookies immediately after removing them from the oven. Leave them on the baking sheet for 5–10 minutes to firm up, then cool completely on a wire rack. It is normal for crisp cookies to seem fragile while warm; they will develop structure as they cool.
Common Mistakes
Adding flour continuously because the dough is sticky
Why it causes problems: Too much flour lowers the ratio of fat to flour, so the dough may be dry and the cookies may be hard after baking.
Correct use: Add the remaining flour gradually. If the dough is warm, chill it for 20–30 minutes, then reassess its consistency.
Using melted butter
Why it causes problems: Melted butter can soften the dough too much, cause the cookies to spread more in the oven, and change the intended fine, crumbly texture.
Correct use: Use the butter softened but not melted, at about 18–21°C.
Kneading the dough for too long after adding the flour
Why it causes problems: Extended mixing develops more gluten, so the cookies may become denser and harder.
Correct use: Stop mixing as soon as the dry flour is no longer visible and the dough comes together.
Increasing the starch without limit
Why it causes problems: Although starch supports a crisp texture, using too much can make the cookies very dry, powdery, and prone to crumbling.
Correct use: Unless the recipe specifically calls for more, use starch in moderation as a supporting ingredient.
Putting warm dough straight into the oven
Why it causes problems: When the fat is too soft, the cookies may spread quickly, lose their shape, and the edges may bake before the centers.
Correct use: If the dough leaves grease on your hands or does not hold its shape, chill it for 20–30 minutes.
Overbaking for extra crispness
Why it causes problems: Overbaking removes more moisture than necessary and can make the cookies hard rather than crisp once they cool.
Correct use: Watch the color and texture rather than the time; remove the cookies from the oven as soon as the edges are lightly colored and the center looks baked.
Mayana's Recommendation
Mayana tip: For crisp cookies, dough that does not stick to your hands at all is not the only measure of success. If the dough holds its shape, comes together without cracking when pressed, and does not leave a greasy layer on your hands, do not add flour just to make it drier.
- Bake 2–3 test cookies on the first baking sheet. If they spread too much, chill the remaining dough a little longer; if they become firm, take the next batch out 1–2 minutes earlier.
- Powdered sugar gives a finer mouthfeel than coarse-grained sugar and suits the classic melt-in-your-mouth cookie texture. However, do not randomly replace the type of sugar without changing the rest of the recipe.
- Instead of looking for a single “magic ingredient” for crispness, manage the fat ratio, minimal mixing, measured flour, short resting time, and proper baking together.
Additional Information
If the dough is too dry: Stop adding more flour. If the dough is crumbling and does not come together when pressed, try bringing it together by gradually working in 1 teaspoon soft butter without disrupting the recipe’s fat balance.
If the dough is too soft: Instead of adding flour first, let it rest in the refrigerator for 20–30 minutes. If it is still runny or does not hold its shape after chilling, add flour in very small amounts.
Storage: Store the cookies in an airtight container once they have cooled completely. Sealing warm cookies can cause condensation inside and soften their crisp texture.
Note: The temperatures and times given are starting points for small to medium butter-based crisp cookies. For egg-based, filled, very thick, or high-starch recipes, follow the recipe’s own baking instructions first.
Frequently Asked Questions
What makes a cookie crisp and crumbly?
The key factor is not a single ingredient but the fat coating the flour and limiting gluten development. The right fat-to-flour ratio, brief mixing, and avoiding excess flour work together to create a melt-in-your-mouth texture.
Is starch necessary for crisp cookies?
No. Because starch does not form gluten, it can support crispness and a delicate texture, but it is not required in every cookie recipe. If the recipe is not suited to it, too much starch can make the cookies dry and excessively fragile.
Why does cookie dough become hard?
The most common causes are adding too much flour, packing the flour when measuring it, and kneading the dough longer than necessary after adding the flour. Overbaking can also produce a hard result once the cookies come out of the oven.
What temperature do you bake crisp cookies at?
If the recipe does not specify a temperature, 165–170°C with conventional top-and-bottom heat is a practical starting range for small butter-based crisp cookies. In a fan oven, the temperature is generally reduced by 10–15°C; because thickness and recipe ingredients affect the baking time, always watch for the color and texture cues.
Does cookie dough need to rest in the refrigerator?
If the dough is very soft, greasy, or spreads easily, chilling it for 20–30 minutes is helpful. This firms up the fat, helps the dough hold its shape, and controls spreading in the first batch.
Other Cooking Tips and Techniques
Access the other explanations, tips and practical guidance published in the Cooking Tips and Techniques section from a single screen.