
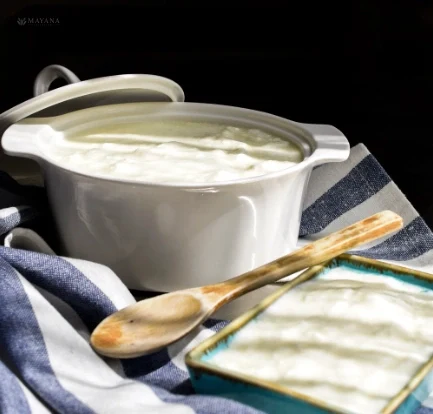
Constant-Temperature Yogurt Making: Keeping the Temperature at 42–44°C
Keep the yogurt-making temperature as close to 42–44°C as possible for an even set. A thermometer, good insulation, and careful timing reduce the risk of runny, overly sour, or curdled yogurt.
Quick Answer
The practical target for making yogurt is to keep the inoculated milk at about 42–44°C. A noticeable drop slows fermentation, while excessive heat can reduce the activity of the yogurt culture. For the most even result, check the temperature with a thermometer, begin checking the texture from the 4th hour without disturbing the container, and refrigerate the yogurt as soon as it sets.
In This Guide
Key Reasons
- Around 42–44°C: Provides fast, even fermentation for homemade yogurt.
- A drop below 40°C: Slows fermentation; the process may take longer and the yogurt may set late.
- 46°C and above: The culture may weaken, especially if the temperature stays high for a long time; the yogurt may fail to set, develop an overly curdled texture, or release whey.
- Frequent temperature fluctuations: Change the fermentation rate and can lead to differences in texture from batch to batch.
Proper Application
- Prepare the milk. Use pasteurized milk. For a fuller texture, heating the milk to approximately 82–88°C and holding it hot briefly may make the protein structure more suitable for yogurt formation; then cool it.
- Cool it to the fermentation temperature. When the milk reaches 42–44°C, get ready to add the starter. If possible, use a digital kitchen thermometer instead of testing the temperature with your finger.
- Warm the starter. Loosen the plain, live-culture yogurt you will use with a few spoonfuls of lukewarm milk in a small bowl, then gently stir it into the main batch of milk. If you are using a ready-made starter culture, follow the manufacturer's dosage and temperature instructions.
- Reduce heat loss. Temper the jars with lukewarm water beforehand, then dry them. After filling them with the inoculated milk, place the jars in a yogurt maker, a thermostat-controlled environment, or an insulated water bath that can be maintained at around 42–44°C.
- Keep the environment steady. Aim for a core temperature of about 43°C. If you use an oven, do not leave it running; use a low-heat method such as a switched-off oven with the light on only after confirming with a thermometer that it stays within the 40–45°C range. Even some ovens' lowest settings may be too hot for yogurt.
- Do not open the lid unnecessarily. During the first few hours, do not move, stir, or shake the container. If you are using an insulated container, occasionally measure the surrounding temperature or the water bath; do not keep opening the yogurt to check it.
- Check the texture from the 4th hour onward. At around 42–44°C, many homemade yogurts set noticeably within 4–6 hours; the timing may vary with the starter's strength, the structure of the milk, and the culture used. Stop the fermentation when the yogurt has the appearance of a soft gel that stays intact when the container is tilted slightly.
- Chill it immediately. Once the yogurt has set, refrigerate it without stirring. Resting it in the cold for at least 4–6 hours helps the structure firm up.
Signs of Success
- The surface looks smooth and intact.
- When the container is tilted slightly, the yogurt does not move like runny milk.
- The smell is clean and mildly sour, with no sharp, unfamiliar, or spoiled odor.
- A small amount of whey may be normal; noticeable separation may indicate excessive heat, prolonged fermentation, or disturbance.
Common Mistakes
Adding the starter to milk that is too hot
Why it causes problems: Prolonged temperatures above 46°C can reduce the activity of the yogurt culture and disrupt fermentation.
Correct use: Combine the starter with milk at approximately 42–44°C and check it with a thermometer.
Continually raising and lowering the temperature during fermentation
Why it causes problems: The fermentation rate changes, making it easier for the yogurt to set late, become overly sour, or develop an uneven texture.
Correct use: Keep the temperature as steady as possible with a yogurt maker with a thermostat, a controlled water bath, or a well-insulated setting.
Relying on the oven’s low setting without using a thermometer
Why it causes problems: Some ovens run too hot for yogurt cultures even on a low setting, and large temperature fluctuations can occur inside.
Correct use: Check the oven temperature with a separate thermometer, and do not use a setting that falls outside the target range.
Opening, moving, or shaking the container frequently while the yogurt is culturing
Why it causes problems: The newly forming protein network can break down, increasing lumpiness and whey separation.
Correct use: Leave the container undisturbed from the first few hours onward, and check the consistency gently after the 4th hour.
Extending the culturing time longer than necessary just to make the yogurt firmer
Why it causes problems: As fermentation continues, the yogurt may become more sour and release more whey.
Correct use: Once the yogurt has set into a gel, stop culturing and chill it without stirring.
Mayana's Recommendation
Mayana tip: The easiest way to maintain a steady temperature is not to add heat just to make it “warmer,” but to establish the right temperature at the start and reduce heat loss. Tempering the jars, using an insulated container, and monitoring a single reference point with a digital thermometer produce very consistent results in a home kitchen.
- If you use a water bath, place the water around the jars, not inside them, and do not let it rise above the lid level.
- If you are using the same milk and the same starter, note the starting temperature and holding time from your successful batch, and use those values as a reference for subsequent batches.
Additional Information
Using cold starter: Instead of adding starter straight from the refrigerator to a large amount of milk, loosen it with a few spoonfuls of lukewarm milk to reduce temperature shock and distribute it more evenly.
Raw milk: For food safety, raw milk should not be considered suitable for culturing directly; first apply reliable pasteurization or heat treatment.
Culture differences: This guide is for thermophilic yogurt cultures commonly used in store-bought yogurt. Mesophilic starters that work at room temperature may require different temperatures and times; follow the instructions on the starter package first.
Frequently Asked Questions
At what temperature does yogurt culture?
For home-style thermophilic yogurt cultures, the practical target is about 42–44°C. Around 41–45°C may work for many cultures; if you are using a starter product, follow the manufacturer’s temperature first.
What happens if the temperature drops while culturing yogurt?
When the temperature drops significantly, fermentation slows and the yogurt may take longer to set. That is why it is important to insulate the container well and avoid opening it unnecessarily.
What happens if the yogurt incubation temperature is too high?
If the temperature rises above approximately 46°C and remains high for a long time, it can weaken the culture. This may cause the yogurt to set slowly, fail to set, or develop an uneven texture.
What temperature should the oven be when incubating yogurt?
The goal is not to bring the oven to a baking temperature, but to keep the area around the jars at approximately 40–45°C. Use the oven light or very low heat only if a separate thermometer confirms that this range is maintained.
How many hours should yogurt incubate?
At approximately 42–44°C, many homemade yogurts set within 4–6 hours. The exact time varies depending on the milk, amount of starter, culture activity, and desired tang; after the 4th hour, use the yogurt’s consistency as your guide.
More Cooking Information from the Cooking Techniques Category
Access the other explanations, tips, and practical information published in the Cooking Techniques section from a single screen.