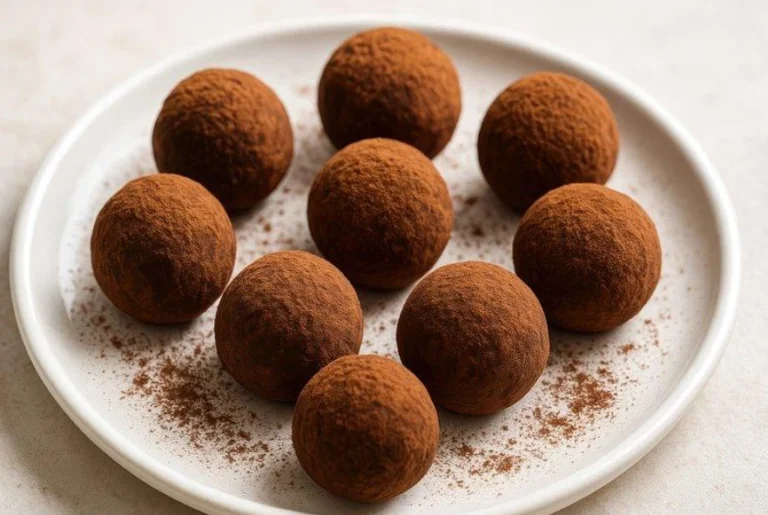
Brownie Bites
Chocolate-rich little brownies with gently set edges and soft, fudgy middles.
How do you keep brownie bites fudgy instead of dry?
For fudgy brownie bites, combine melted dark chocolate and butter with sugar, eggs, a small amount of flour, and cocoa. Divide the batter between 24 well-greased mini muffin cups and bake just until the rims are set and a tester shows moist crumbs, not wet batter. Let the bites firm up in the pan before lifting them out; overbaking dries their small centers quickly.
- Yield
- Approximately 24 mini brownie bites
- Servings
- 12 servings
- Total time
- 34 min
- Difficulty
- Easy
- Prep time
- 20 min
- Cook time
- 14 minCool in pan, then finish cooling: At least 10 min, ideally 30 min
Ingredients for Brownie Bites
For the Brownie Batter
How to Make Brownie Bites
Enlarges the steps and, on supported browsers, helps keep your screen awake.
-
01
Preheat the oven and prepare the pan
5 minutesSet an oven rack in the center and preheat a conventional oven to 175°C (about 350°F). Grease all 24 wells of a standard mini muffin pan thoroughly, including the upper rims; alternatively use mini muffin paper liners.
-
02
Melt the butter and dark chocolate
4 minutesPlace 110 g cubed unsalted butter and 80 g chopped dark chocolate in a heatproof bowl over barely simmering water, keeping the bottom above the water, or use a microwave in 15–20-second bursts. Stir until smooth, then leave about 5 minutes to cool until warm, not hot.
-
03
Whisk the eggs and sugars
2 minutesIn a mixing bowl whisk 2 large eggs with 170 g granulated sugar and 40 g light brown sugar for 1–2 minutes until cohesive and slightly paler. Stir in 5 mL pure vanilla extract. Do not whip into a thick sponge-like foam.
-
04
Combine the wet mixtures
2 minutesPour the warm chocolate-butter mixture gradually into the egg-and-sugar mixture while whisking gently until the color and texture are uniform. Keep the mixture warm enough to flow but not hot enough to cook the egg.
-
05
Fold in the dry ingredients
2 minutesSift 65 g all-purpose flour, 25 g unsweetened cocoa powder, and 2 g fine salt together. Fold them into the chocolate mixture with a spatula just until no dry streaks remain; stop without beating extra air into the batter. Do not taste the raw batter.
-
06
Fill all 24 mini wells
4 minutesUsing a small scoop or two teaspoons, divide the batter as evenly as possible among the 24 prepared mini muffin wells, filling each roughly three-quarters full. Wipe any drips from the pan surface so they do not burn.
-
07
Bake until the centers are just set
12–15 minutesBake on the center rack at 175°C conventional (about 350°F) for approximately 12–15 minutes. Start checking at minute 12; the rims should be set, the tops lightly crackled, and a tester in the center should bring up moist crumbs without liquid raw batter. Oven and cavity sizes vary; do not wait for a bone-dry tester.
-
08
Cool and release the bites
10–30 minutes, passiveSet the pan on a rack and leave the brownie bites in their wells for at least 10 minutes. Gently loosen around the rims if needed and transfer to a rack to cool further. Serve plain once the centers have settled; the ideal full cooling period is about 30 minutes.
Mastery Guide
Review the technical details, common mistakes and correct practices that determine the recipe result.
Critical Tips
Pull Them Before They Dry
Small brownie wells lose moisture rapidly after the center sets.
Best practice: Start checking at 12 minutes and stop when the edges are set and a tester carries moist crumbs, not fluid batter.
Let the Melted Chocolate Cool Slightly
Very hot fat and chocolate can scramble the eggs or split the batter.
Best practice: Wait until the mixture is warm rather than hot before combining it with the eggs.
Leave Room in Each Well
Batter expands and a full cup can mushroom over the pan, leading to uneven baking.
Best practice: Divide evenly and fill each mini well about three-quarters full.
Release After a Short Pan Rest
The soft brownie structure is fragile straight from the oven.
Best practice: Cool 10 minutes in the pan before loosening gently and moving to a rack.
Common Mistakes
Overbaking Until the Tester Is Dry
A perfectly clean toothpick often means miniature brownies have already lost their fudgy center.
Best practice: Look for damp crumbs and no uncooked liquid batter; use a short bake window.
Overmixing After Adding Flour
Extended stirring strengthens gluten and turns the bite chewy in a bread-like way.
Best practice: Fold just until the last dry flour streak disappears.
Adding Eggs to Hot Chocolate
Eggs may form small cooked flecks and the mixture can become grainy.
Best practice: Cool the melted mixture briefly, then mix with the egg-and-sugar base.
Using a Regular Muffin Tin Unchanged
Larger wells alter the portion, heat transfer and timing.
Best practice: Use a 24-well mini pan for this 24-piece yield; adjust baking separately for different pans.
Why Does This Happen?
Why the Edges Set First
The metal walls transfer heat directly into the small portions.
Best practice: Judge doneness by the firm rim and softly set center rather than by an evenly dry crumb.
Why Sugar Helps the Surface Shine
Sugar dissolving in the wet phase and setting with egg proteins promotes a delicate shiny surface.
Best practice: Whisk the eggs with the sugars until cohesive, without aerating them into a sponge batter.
Why Less Flour Means a Fudgier Bite
A lower flour-to-fat-and-chocolate ratio gives less starch structure and a denser interior.
Best practice: Weigh 65 g flour; do not add extra simply because the batter looks thick.
Why Cooling Firms the Centers
Chocolate fat and the baked egg-starch network settle as temperature falls.
Best practice: Let bites rest before removing so the centers stay intact.
Mayana Tips
Portion with a Small Scoop
Even portions reach the same doneness without dry and undercooked pieces in one tray.
Best practice: Divide batter evenly across 24 cavities, approximately 25 g of raw batter per cavity before bowl loss.
Prepare the Pan Before Mixing
Brownie batter can thicken while waiting and stick to unprepared wells.
Best practice: Grease every cup thoroughly or use well-fitting mini muffin liners before combining ingredients.
Choose the Best Serving Moment
Chocolate flavor is pronounced when the bite is fully set but not fridge-cold.
Best practice: Serve at cool room temperature after the minimum pan rest and additional cooling as preferred.
Freeze Extras Individually
A large frozen clump is awkward to portion and invites repeated thawing.
Best practice: Freeze cooled pieces in one layer, then transfer to a labeled freezer-safe container.
Ingredients & Measurements
Use Actual Dark Chocolate, Not a Cocoa Swap
Chocolate contributes cocoa butter and sugar as well as flavor; cocoa powder is mostly dry solids.
Best practice: Weigh 80 g of 60–70% dark chocolate rather than substituting 80 g cocoa.
Choose Unsalted Butter
Salt in salted butter varies by brand and would change the seasoning level.
Best practice: Use 110 g unsalted butter and add exactly 2 g fine salt separately.
Weigh the Flour and Cocoa
Packed cups can accidentally raise the dry solids and make the bites cakey.
Best practice: Measure 65 g all-purpose flour and 25 g cocoa on a kitchen scale.
Keep Both Sugars in Their Roles
White sugar provides sweetness while a smaller share of brown sugar adds mild molasses notes and moisture.
Best practice: Use 170 g granulated plus 40 g light brown sugar; reducing the total substantially changes set and texture.
Cooking Techniques
Melt Gently
Direct high heat can scorch chocolate and separate the cocoa butter.
Best practice: Warm butter and chopped chocolate together over very low heat or short microwave bursts, stirring between bursts.
Blend Eggs Without Excess Air
Large foam volume creates a cakier, more fragile rise than this brownie style needs.
Best practice: Whisk eggs with sugars for about 1–2 minutes until smooth and cohesive, not ribbon-thick.
Fold the Dry Ingredients
Flour hydrates quickly and prolonged beating promotes gluten.
Best practice: Add flour and cocoa together, then fold with a spatula until combined.
Bake on the Center Rack
High or low placement can brown one surface before the mini centers are set.
Best practice: Preheat a conventional oven to 175°C / about 350°F and place the mini pan in the center; check from minute 12.
How to Store and Make Brownie Bites Ahead
- Serving temperature
Serve once cooled and set, ideally at cool room temperature; avoid leaving in strong sun or a hot kitchen.
- Best resting time
Leave in the pan at least 10 minutes, then cool on a rack; about 30 minutes total cooling gives a more stable center for clean removal and serving.
- Refrigerator storage
In warm or humid conditions, or for longer holding, refrigerate in a sealed container for up to 5 days; bring portions to room temperature before serving for a softer texture.
- Room-temperature limit
Store completely cooled, unfilled brownie bites airtight in a cool, dry location for up to 3 days. Refrigerate earlier if the room is hot or humid.
- Freezing
Freeze completely cooled bites in a single layer, then pack airtight and freeze for up to 2 months for best quality.
- Thawing method
Thaw individual frozen bites covered at room temperature until no longer frozen, usually 30–60 minutes depending on size; do not refreeze thawed portions repeatedly.
- Reheating
For a just-warm center, heat one completely thawed bite briefly, around 5–8 seconds in a microwave; check before adding time to prevent drying.
- Make-ahead steps
Bake a day ahead, cool fully, then seal airtight. For longer preparation, freeze on the baking day and thaw the number needed.
- Serving suggestion
Offer 2 plain bites per serving; no topping is included in the nutritional estimate.
Nutrition
1 serving: 2 brownie bites; including serving additions
Estimated per 2 brownie bites from standard nutrient values for the measured ingredients; the batch is divided into 12 equal servings. Ingredient-based estimates; actual values vary with chocolate brand and portion size.
Frequently Asked Questions About Brownie Bites
How do I keep brownie bites fudgy?
Use weighed flour and chocolate, avoid beating after adding flour, and begin checking the mini pan at 12 minutes. Remove once the rims are set and the center tester has moist crumbs but no uncooked batter.
Can I make these brownie bites in a regular muffin tin?
Yes, but it becomes a different size and yield. Fill larger wells only partway, begin checking later than the mini pan, and use the moist-crumb test instead of the 12–15-minute mini-pan timing.
Can I use milk chocolate instead of 60–70% dark chocolate?
You can, but milk chocolate is sweeter and usually contains less cocoa solids, so the bites will have a milder flavor and potentially softer structure. The stated formula is balanced for dark chocolate.
Why do my mini brownies stick to the pan?
Insufficient greasing and removing them while hot are common causes. Coat each well thoroughly or use fitting mini muffin liners, then let them set in the tin for at least 10 minutes before releasing.
Can I freeze brownie bites?
Yes. Cool completely, freeze spaced apart, then seal in a freezer-safe container for up to 2 months for best quality. Thaw individual portions while covered before serving.
Can I make the batter ahead of time?
For the most even result, bake soon after mixing. Instead of holding raw egg-and-flour batter, bake the bites ahead, cool completely, and store them airtight or freeze the finished pieces.
Are brownie bites safe to taste before baking?
No. Raw flour and raw eggs may carry harmful microorganisms. Do not taste uncooked batter; bake thoroughly until the center has set and there is no fluid raw batter.
You may also like